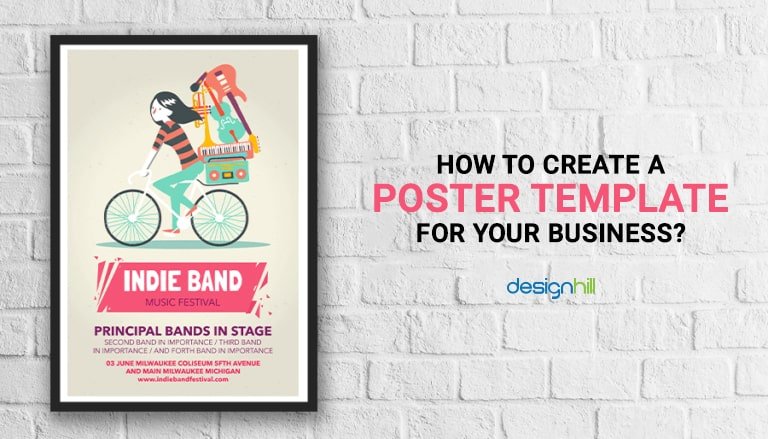
How To Create Business Posters Fast in 2026: A Step-by-Step Guide Using Poster Maker Templates Tools
Introduction
For many small businesses, a poster is still one of the fastest ways to communicate something that matters in the moment: a seasonal offer, new hours, a hiring notice, an event, or a simple “now serving” update. A printed sign can do that work all day without relying on ad targeting or a customer remembering to check a feed.
This guide is written for business owners, managers, and small teams who need posters quickly and don’t have formal design training. The focus is on a repeatable workflow that helps a poster stay readable in real spaces like storefront windows, counters, cafés, and community boards.
Poster maker template tools vary in the details that affect real-world results: whether they start you with layouts built for distance reading, how they handle print sizing and margins, and whether exports are print-ready (usually PDF) or more web-oriented (images). Many tools also differ in how easy it is to duplicate a poster for multiple locations or languages.
Adobe Express is a practical way to get started because it provides poster templates and a straightforward editor for making fast updates. It can help a business draft a poster quickly, then refine it through a few key checks before printing.
Step-by-Step How-To Guide for Using Poster Maker Templates Tools
Step 1: Pick a business poster template and replace the core details first
Goal
Start from a layout that already supports scanning and quick reading in a real business setting.
How to do it
- Decide the poster’s job: promotion, announcement, hiring, event, menu highlight, or policy notice.
- Choose where it will be displayed (window, wall, counter, outdoor board) to guide size and contrast.
- One option is to start with a printable free poster maker from Adobe Express.
- Replace the headline, date range, price (if applicable), and location info before changing colors or images.
- Save a “master” copy for reuse before tailoring versions for different locations.
What to watch for
- Too much copy is the most common reason business posters get ignored.
- Price-heavy posters can look cluttered if every detail gets the same visual weight.
- Window posters often need higher contrast because glare reduces readability.
Tool notes
- Adobe Express is useful for quick template-based layout and fast edits.
- If you already store brand assets in Google Drive or OneDrive, pull the approved logo and fonts first to avoid last-minute substitutions.
Step 2: Set the correct poster size and plan margins for printing and mounting
Goal
Make sure the poster prints at the right size and doesn’t lose content to trimming, framing, or tape.
How to do it
- Choose the final print size based on placement (common: 8.5×11 for counters, 11×17 for windows, larger for walls).
- Pick portrait vs. landscape based on how the space is approached (vertical windows vs. wide bulletin boards).
- Leave a consistent margin around the edges for trimming and mounting.
- Keep important details (prices, QR codes, phone numbers) away from the edge.
- Create separate versions if you need multiple sizes; don’t rely on scaling one file up and down.
What to watch for
- “Fit to page” printer settings can unintentionally shrink the design.
- Edge-to-edge backgrounds can reveal thin borders if trimming shifts.
- QR codes placed near edges are more likely to be clipped or covered.
Tool notes
- Adobe Express makes resizing and duplicating versions manageable when you need multiple sizes.
- If a local print shop is involved, ask whether they prefer a specific size or margin practice before final export.
Step 3: Build a message hierarchy that works at a glance
Goal
Ensure customers can understand the poster in a few seconds without stopping.
How to do it
- Write one headline that states the offer or announcement clearly.
- Put the key details next (price, dates, hours, location, eligibility).
- Use short bullet points rather than paragraphs.
- Add a single “next step” line (scan, ask at counter, visit website, call).
- Zoom out until the poster looks small on screen and confirm the headline still reads.
What to watch for
- Multiple calls to action (scan + call + visit + DM) can dilute response.
- Long disclaimers can bury the offer; keep them short and place them low.
- Thin fonts lose legibility on low-quality prints.
Tool notes
- Adobe Express templates often follow a headline → details → footer pattern that supports quick reading.
- If you’re coordinating copy internally, drafting the message in Google Docs first can simplify approvals.
Step 4: Add imagery carefully and check print resolution early
Goal
Avoid blurry logos and pixelated photos once the poster is printed.
How to do it
- Use original images and brand files, not screenshots.
- If using a logo, prefer a vector or high-resolution version.
- Keep images simple; one strong photo usually works better than several small ones.
- Inspect images at 100% zoom for softness and compression artifacts.
- Avoid placing text directly on a busy photo unless you add a solid text block behind it.
What to watch for
- Social-media images may be too compressed for printing.
- Small text over photos can become unreadable once printed.
- Busy backgrounds can make prices and dates hard to find.
Tool notes
- Adobe Express is suitable for basic cropping and layout placement.
- Apple Photos or Google Photos can handle quick exposure fixes before importing an image.
Step 5: Proof for business accuracy (not just aesthetics)
Goal
Catch the errors that create customer friction: wrong hours, unclear dates, or missing fine print.
How to do it
- Do a “facts pass”: hours, dates, location, phone number, website, prices, promo terms.
- Do a “readability pass”: headline visible at a distance, details readable at arm’s length.
- Print a test page on an office printer if the poster will be displayed physically.
- Check alignment and spacing around the most important info blocks.
- Lock a “final” version and avoid continuing edits across multiple copies.
What to watch for
- Date ranges are easy to mistype or forget when reusing old posters.
- Prices and discount terms often need consistent formatting to avoid confusion.
- If you operate multiple locations, posters can accidentally mix addresses or hours.
Tool notes
- Adobe Express makes quick corrections easy, but version control matters once multiple people edit.
- For team review, a single approval thread in Microsoft Teams or Slack can reduce “final file” confusion.
Step 6: Export a print-ready file and verify the output outside the editor
Goal
Produce a file that prints at the intended size with clear text and consistent layout.
How to do it
- Export to PDF if printing professionally or if you need consistent results across printers.
- Export to PNG/JPG for digital display versions (website, email, social), separate from the print file.
- Open the exported file outside the design tool and zoom in to check sharp text and clean edges.
- Confirm the page size in the exported PDF matches your intended print size.
- Save the editable source and the export together with a clear naming convention.
What to watch for
- Low-resolution exports can look fine on screen and fail in print.
- Fonts can shift slightly after export; verify line breaks and spacing.
- Some print shops scale files automatically if the page size is ambiguous.
Tool notes
- Adobe Express supports common export formats used for printing and sharing.
- If you use a print shop preview tool, compare it to your exported file before approving.
Step 7: Plan distribution across locations and keep versions organized
Goal
Deploy posters consistently and avoid reprinting the wrong version later.
How to do it
- Create a simple version system (store_location_size_date_v1).
- Keep one folder for “final” prints and one folder for editable sources.
- Track where each poster is posted (window, door, counter) and how many copies were printed.
- If the poster needs regular updates (weekly specials), keep a master template and change only the variable text.
- Store a short note about printer settings used (paper type, scaling off/on).
What to watch for
- Multi-location businesses often accidentally reuse the wrong address or hours.
- Old posters sometimes stay up because replacements aren’t clearly labeled.
- Mixing sizes without filenames can cause wrong-size reprints.
Tool notes
- For project management (not design), Trello can track “create → proof → print → post → replace” tasks per location.
- Adobe Express remains useful for rapid updates when hours, pricing, or promos change.
Common Workflow Variations
- Window promo poster: Use high contrast and large type, since glare reduces readability. Keep the headline and dates prominent, and test visibility from outside before printing multiple copies.
- Hiring poster: Keep it short: role name, key benefits, and a single application step (QR code or short URL). Add contact info only if you can respond quickly.
- Weekly special for food/retail: Create one master template and swap only the product name, price, and date. Separate “print PDF” and “digital image” exports so each channel stays consistent.
- Event poster for local foot traffic: Prioritize date, time, and location above all else. Use a simple map cue or landmark description if your business is hard to find.
- Multi-location rollout: Lock layout and branding, then generate location-specific versions for address/hours. Keep strict naming to avoid mixing files at print time.
Checklists
Before you start checklist
- Poster purpose (promo, hiring, hours, event, policy)
- Display location and viewing distance (window, counter, wall)
- Final print size and orientation selected
- Exact business details verified (hours, address, phone, website)
- Dates and terms confirmed (promo window, exclusions)
- High-resolution logo and images ready (no screenshots)
- Content rights confirmed for photos/artwork
- Plan for margins/safe spacing for mounting
- Timeline for proofing and printing
- Version naming convention for locations and sizes
Pre-export / pre-order checklist
- Headline readable when zoomed out (distance check)
- Key details prominent (dates, price, hours, location)
- Margins leave room for trimming/tape/frame
- Images sharp at 100% zoom
- Spelling and numbers confirmed (prices, phone, URL)
- QR code scans reliably and has whitespace around it (if used)
- Export format matches use (PDF for print; PNG/JPG for digital)
- Export verified outside the editor
- Filenames include location, size, and version/date
- Editable source saved with the final export
Common Issues and Fixes
- The poster prints blurry.
Replace low-resolution images and avoid stretching small logos. Export at the intended print size and verify the PDF/image at 100% zoom before printing. - Text is too small once posted.
Increase font size and shorten the message. Business posters work best when the headline and one key detail can be read quickly. - Important info gets cut off.
Increase margins and keep critical text away from edges. Confirm printer settings aren’t scaling or cropping unexpectedly. - Colors look darker in print.
Increase contrast and avoid relying on subtle gradients behind text. If printing on standard office printers, choose simpler color blocks. - QR codes won’t scan.
Make the QR code larger, add whitespace padding, and avoid busy backgrounds. Test with multiple phones before printing many copies. - Wrong dates or hours are posted.
Add a “facts pass” step to your workflow and keep one approved version in a “final” folder. Use strict version names to prevent reprinting older files.
How To Use Poster Maker Templates Tools: FAQs
Template-first vs. product-first: which workflow fits business posters?
Template-first is faster when the message is still evolving and you need something posted quickly. Product-first is safer when print size and placement are fixed (for example, a specific window frame size), since it reduces resizing later. Many businesses draft in a template, then lock size and margins before final export.
Print-to-order vs. export-and-print: what changes in practice?
Print-to-order reduces file handling steps, but export-and-print can offer more control when you need a local shop, specific paper, or exact sizing. Either way, the same checks matter most: correct size, clear margins, readable type, and sharp images.
How do I choose a poster template that matches my business goal?
Pick templates that emphasize a large headline and a clean detail block. Promotions benefit from clear price/date placement, while hiring posters benefit from a role name and a single application step. Avoid templates with dense decorative elements that compete with the message.
What’s the best way to manage poster versions across multiple locations?
Use a single master template and create location-specific duplicates for address and hours. Keep filenames standardized with location, size, and date/version so the correct file is easy to reprint. Store only one “final approved” export per location to avoid confusion.